Purpose
I wanted to setup a small low power system as a hub for adding automation scripts on my home network and also attach home automation devices.Devices
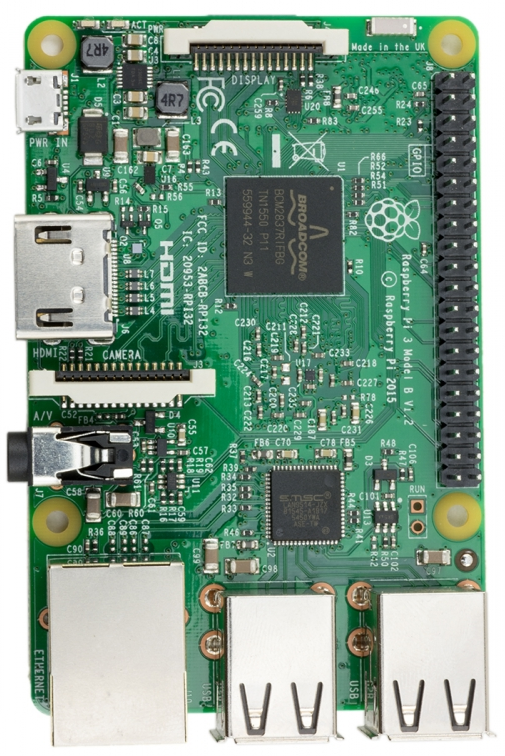
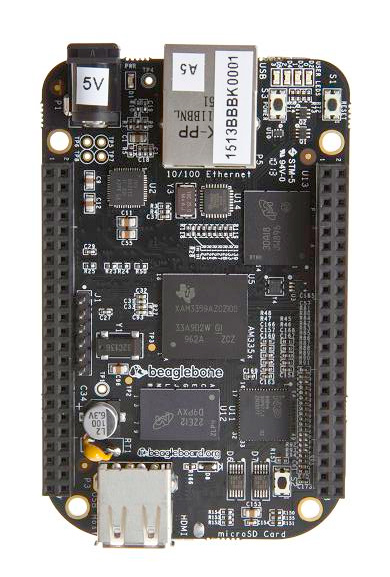
As of April 2016 I considered the BeagleBone Black and Raspberry Pi 3. |  |
- More RAM 1GB vs 512MB
- 1.2GHz processor vs 1GHz
- Built in Wifi Controller
- Built in Bluetooth and Bluetooth LE
Only thing is Raspberry Pi does not have on board storage compared to 4GB on Beaglebone. I ordered the board and am waiting for the board to arrive by tomorrow. I have also ordered a 64GB class 10 SD card to use with the Raspberry Pi board.
Setup
Ubuntu Mate
- Downloaded Ubuntu Mate 16.04 from here
- Extracted it with Winrar
- Burned the image on my 64GB MicroSD card using Win32 Disk Imager
- Connected a HDMI monitor and USB mouse and keyboard to the Pi and plugged in the MicroSD card.
- Plugged in the power supply and the Ubuntu setup began.
- Got a few low disk space warnings but ignored them
- After setup done then clicked on Raspberry Pi Info button on the Welcome Dialog and in there was a button to Resize Image which resized the root partition to cover the entire MicroSD Card
- The internet connection wifi or ethernet should be set to connect for all users so that when the device boots up in a server mode it connects to the network without anyone logging in so ssh can connect to it.
- One of my old monitors was not showing its full resolution going to Display settings showed that Raspberry thought it was an unknown monitor. To fix that I had to edit the file
/boot/config.txtto uncomment the linedisable_overscan=1 - To route the sound to the headphone jack use the command
sudo amixer cset numid=3 1. To direct the sound to HDMI usesudo amixer cset numid=3 2 - After this disabled the graphical user interface:
-
sudo graphical disable
-
New user
- Added new user:
-
sudo adduser newusername
-
- Add to sudoers list
-
sudo adduser newusername sudo
-
IP and host settings
- Make sure the name in /etc/hostname is also there in /etc/hosts. Below are example contents of the 2 files
/etc/hostname:
The 2 linksbelow give good information about setting static IP in the raspberry pi:
https://www.ionos.com/digitalguide/server/configuration/provide-raspberry-pi-with-a-static-ip-address/#:~:text=To%20assign%20an%20IP%20address,with%20the%20IPv4%20address%20192.168.
https://www.raspberrypi.org/documentation/configuration/tcpip/
Since I have multiple raspberry pi's on my LAN. I make their IPs static by configuring on the router so I can manage all from 1 place.
Wifi dropping problem
I kept getting my wifi drop connection. I saw the solution here by searching for some lines I saw in/var/log/syslog when the wifi dropped. Basically you need to turn off the power save mode. To do that run the following commands:To make the change permanent add this line to
/etc/rc.local file:SSH Server
- SSH was already running so setting up the authentication protection according to the link: http://serverfault.com/questions/275669/ssh-sshd-how-do-i-set-max-login-attempts
- Do the following steps to set the max login attempts per session to 1 and to lock out for 120 seconds
- Add the following line to /etc/ssh/sshd_config
-
MaxAuthTries 1
-
- Add the following firewall rules
- Create a new chain
- Block each IP address for 120 seconds which establishe more than three connections within 120 seconds. In case of the forth connection attempt, the request gets delegated to the SSHATTACK chain, which is responsible for logging the possible ssh attack and finally drops the request.
- Create a new chain
Installing Lua
- Opened the terminal from Applications->System Tools->MATE Terminal
- First did
-
sudo apt-get update
-
- Now installed the libreadline library needed for Lua compilation
-
sudo apt-get install libreadline-dev
-
- Download the Lua package and extract it.
- Go to the lua directory and do
-
sudo make linux test
-
Installing OpenResty
- Download OpenResty from this page
- Install the prerequisites:
-
apt-get install libreadline-dev libncurses5-dev libpcre3-dev libssl-dev perl make build-essential
-
- Install using the following commands:
- Finally add the command-line utilities provided by OpenResty to your PATH environment, like adding the following line to ~/.bashrc
-
export PATH=/usr/local/openresty/bin:/usr/local/openresty/nginx/sbin:$PATH
-
Starting and stopping NginX
- Start NginX:
- Re-start NginX:
- Stop NginX
Mapping Local Network drive
- Install cifs-utils:
- Make a directory in /media for the mount location
- Now mount the file
After Raspberry Pi Update I had to do:
- See here for more information
Audio Output
Look at this link: https://www.raspberrypi.org/documentation/configuration/audio-config.md to redirect audio betweek HDMI and headphone jackSamba Server
https://www.raspberrypi.org/magpi/samba-file-server/ PDF version is hereNote: If sharing a NTFS drive on the Samba shared drive make sure the permissions with which the drive is mounted is 777 set by the umask parameter in the /etc/fstab file. The umask should be 000
Connecting a VLC player
To connect to the samba server from fire TV or other android devices to stream movies, etc. you can use VLC player.In the VLC player however don't go to Local network to add the server. Go to add server to favorites and then in that form select the SMB protocol, blank for port. Then choose the URL as: pi@192.168.0.188 or something similar where pi is the user name and the local IP of the raspberry pi. Give the folder where you want to start and add it. When you open this it will ask for the password, enter it and click remember password and then OK. Now it should work without asking the password again and again.
Mount USB Drive
To mount the USB Drive I followed the instructions here- Firstly install the following package if you’re using an NTFS drive.
-
sudo apt-get install ntfs-3g
-
- Now if you don’t know the drive UUID, then we will need to get it. You can get a list of drives and their UUID that is currently connected to the Pi by running the following command.
-
ls -l /dev/disk/by-uuid
-
- Now there is likely to be quite a few drives listed. Simply look for any drive that has an address of /sda* where * is a number. In my example, it is 1, so we will use the UUID of CA1C-06BC to mount to.
- Now it is important that we create a clean directory to mount the USB too. To create the directory, enter the following:
sudo mkdir /media/usb1
- Next, we will need to obtain both the uid and the gid. These numbers are important as we will need them to set the correct permissions for the USB drive. To get the gid enter the following command. (If you’re using a different user than pi then make sure you update the username in the following commands). Got 1000
id -g pi
- Get the uid enter the following command. (Got 1000)
id -u pi
- Next, we need to make an edit to the fstab file. It is the file that is called on boot up to set up the drives. To edit this file, enter the following command:
sudo nano /etc/fstab
- Now add the following line to the bottom of this file. Remember to update the line with all the relevant details for your USB drive. (For example, your drive will have a different UUID)
UUID=CA1C-06BC /media/usb1 auto nofail,uid=enter_uid_here,gid=enter_gid_here,noatime 0 0- if you include umask in the above statement and if you want to share the drive over samba server then set umask to 000 to give r/w to everyone.
- Now since the Pi automatically mounts the drive, we will need to unmount the drive. A simple way to do this is to use the following command (Replace /dev/sda1 with the address relevant to your Pi).
sudo umount /dev/sda1
- Now you can use the following command, and your drives should become mounted.
sudo mount -a
- If you want to make sure the drives are restored after the Pi has been shut down then simply run the following command:
sudo reboot