Understanding the GUI
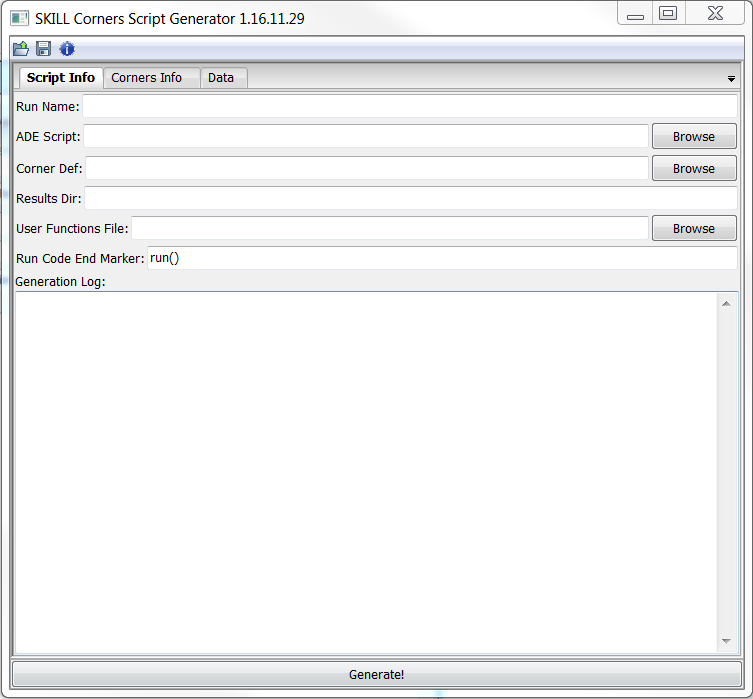
- On the title bar of the GUI you can directly see the version of the tool. This is useful to know if you encounter problems using the tool or if you want to report any bugs in the tool.
- Below the title bar are 3 buttons
- The 1st folder icon button is to open a saved configuration
- The second disk icon button is to save the current configuration to disk
- The third Info icon button is to get the basic About information of the tool
The GUI has 4 tabs.
Script Info

At the bottom is a Generate! button which generates the corners file and prompts you to save it.
This tab has the following entries:
- Run Name - This is the name by which this whole configuration is known. The physical significance is that this is the directory name where the results of all the runs will be saved
- ADE Script - This is the ADE Ocean script that you saved from your typical run. You cannot edit this field manually instead click the browse button to point to the right file.
- Corner Def - This is the Corners definition file for your process. YOu can either type the path to that file manually or point to it using the browse button.
- Results Dir - This is the path where you want the results directory to be created. The results directory by the name given in Run Name will be created on this path and each run results will be written in a sub-directory with the name cornerX where X is a sequential number starting from 1.
- NOTE: If the directory with the same name already exists the corner script will delete it without any warning, so be sure to rename it if you want to keep it.
- User Functions File - This is OPTIONAL field. This entry points to a script file with Lua code which has any functions that you may be using to generate variable values using the advanced call backs in the variable values.
- Run Code End Marker - By default it contains
run(). The tool will pick code from the design("...") command up till this string and use it as it is in every corner run. Anything after this string will be considered to have measurement statements and variables will be extracted from the rest of the string. Normally you don't have to change it. This is useful if we modify the original ocean script to add some code to run the simulation multiple times to search for some value at every corner. For example I may replace the run() command with a for loop that sweeps the supply voltage from normal operation voltage down to 0V and run the simulation at every step and check when the circuit stops functioning. Something like this:-
- Now here in this case I can replace the end marker from run() to
;; --- END MARKERand now my whole loop will be carried over in every corner and I will be able to get the minimum operating voltage of the circuit at every corner.
-
- Generation Log - This is the place where any errors etc. are displayed when the Generation is done.
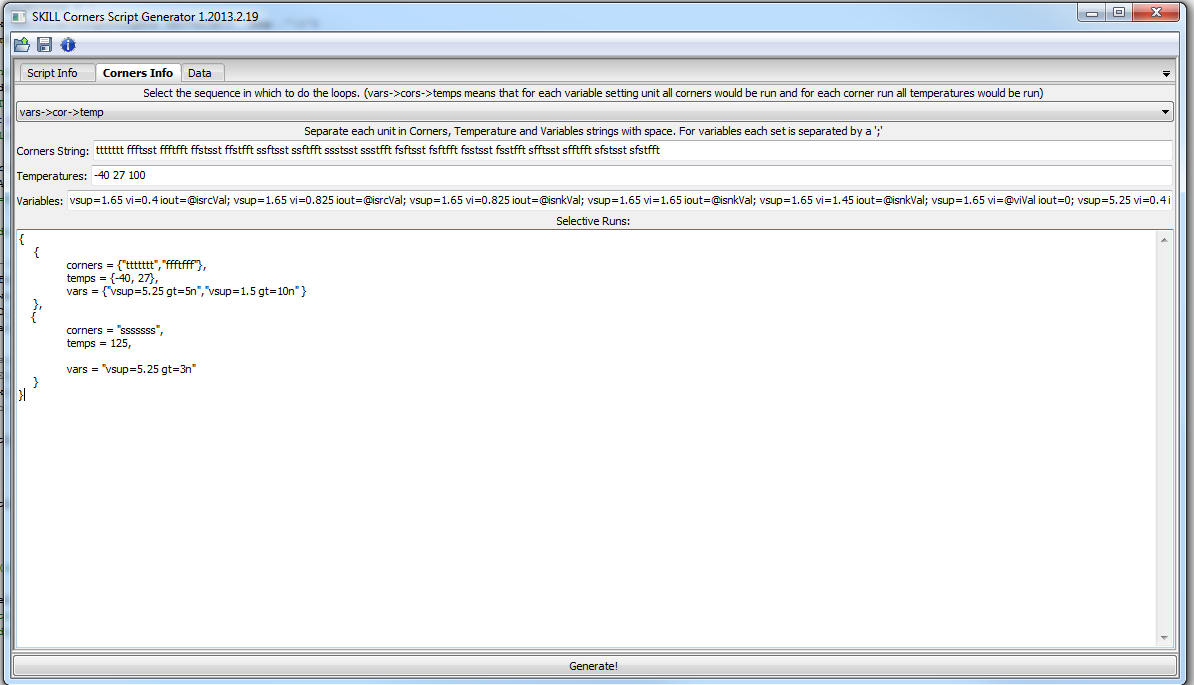
Corners Info

This tab has the following entries:
- Sequence selection - This drop down list allows you to choose in which sequence you would like the corners to run. For example vars->cor->temp means that it will cycle all the temperatures, do this for each corner and then do this for each variable set given to it.
- Corners String - This is the string which specifies which process corners to run. It consists of a set of strings, each of same number of letters, each letter corresponding to the process definition file letters in the same sequence. This string can include '|' characters to improve readability. Those characters are ignored.
- Temperatures - Here you enter the temperatures you want to run the corners at. Each temperature is separated by a space.
- Variables - Here you enter the variable variations you want to enter. Each run uses the variable definitions specified here until it finds a semi colon (;). So each set of variables are separated by semi colons while multiple variable values for a single run are separated by a space as seen in the picture. Variable names can also be generated at run time by calling custom code if a custom code file was linked in the User Functions File entry in the Script Info tab. The code file should have lua functions written which need to be called. If a variable value is set as var=@myfunc then the script generator expects the function myfunc to be defined in the file. The program calls the function as:
- where:
- varstring is the variable name whose value is being requested passed as a string
- cornerString contains the string representing the process corner for which this run is called for example
ttttttt - tempString contains the temperature for which the run is called ecample -40.
- runDAT has corLetters, temperature string and variables all separated by spaces only for the current run. Sample runDat is:
-
, "vsup=1.65 vi=0.4 iout=2.7286902286902e-005 ttttttt -40" - ADEscript contains the full ADE input script from which the corner script is being generated
- The function returns one or more strings containing the variable values. If more than 1 value is returned then it generates runs for all values returned (NOTE: In this case it is like a variables are being sweeped for the same corner and temperature so it partially overrides the sequencing of the runs selection)
- If the variable runs have multiple functions returning multiple values then all permutation corners are created.
- Selective Runs - This box allows you to bypass the permutations of the corners generation and run the corners selectively. The image shows a good example how it is done. Pasted below is the same structure but with comments for better understanding:
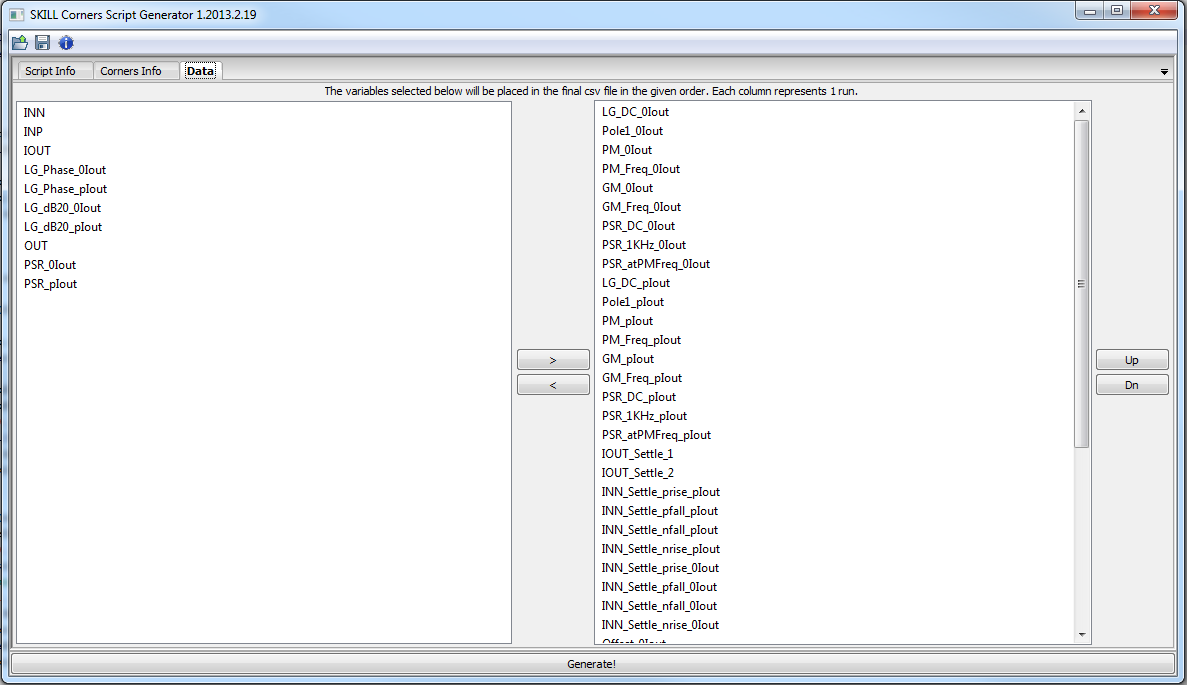
Data Tab

This tab is where you select what measurements from your ADE script you want to see in a CSV file
This tab just has 2 lists. One on the left will not be in the CSV file while the one on the right will be on the CSV file. The order of the items can be changed by selecting the item(s) and pressing the UP/DN buttons.
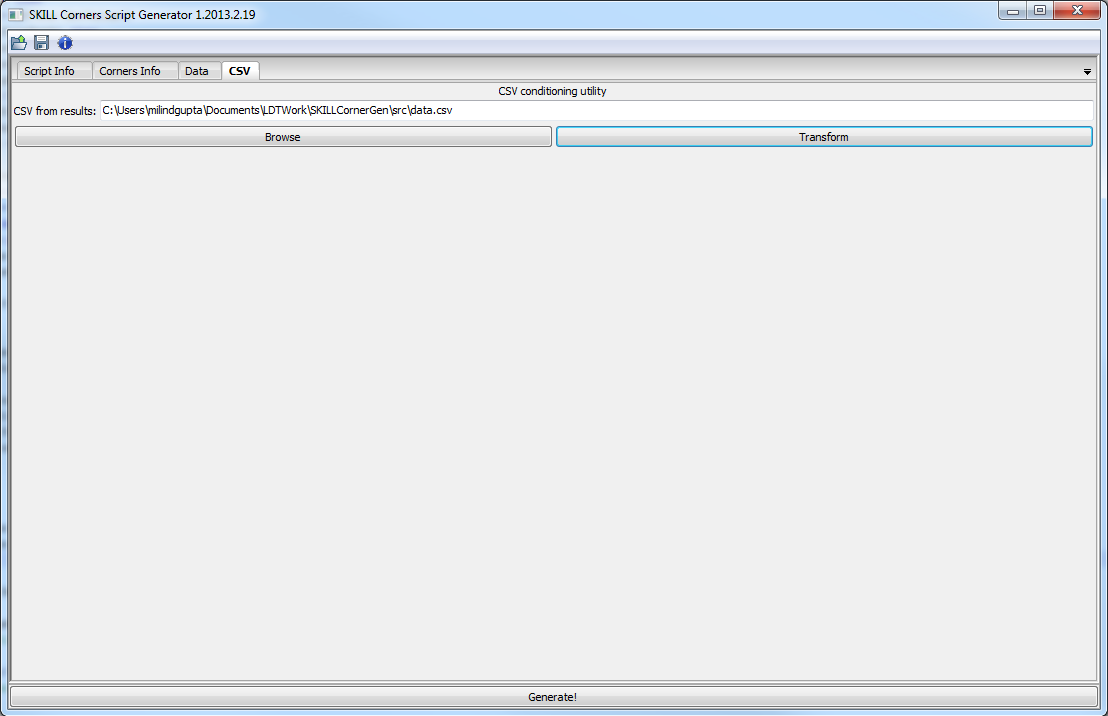
CSV Tab

This tab allows you to condition the csv created by the corners script to include your measurement parameter names from the setup so that when you import the CSV into excel all the parameter names are already there and need not be typed again. (Saves a lot of time tracking the measurements!)
Just Browse for the output CSV file and click Transform to save the final csv.
NOTE: Newer versions of the tool does not have this tab since the CSV is conditioned automatically by the corner script
The whole flow
- Get your typical simulation running in ADE
- Go to Session->Save Ocean Script to save the ADE script in the local cds directory
- Copy this generated .ocn file to the machine where you have this tool available.
- Point to this script on this tool
- Setup all the entries if this is the 1st time you are setting up the test bench corners or just load a previous saved state.
- Make sure you have all the measurements you need in a spreadsheet on the right column in the Data Tab.
- Hit the Generate! button and save the generated .ocn file
- If any Errors/Warnings resolve them accordingly.
- Copy the ocn file back to your cds directory
- Run the script (Myscript.ocn) by typing
load("Myscript.ocn")in the icfb window
Now it will run all the corners. Once the corner runs have completed there would be a data.csv file in the results directory (directory with the same name as Run Name at path Results Dir)
- Copy the csv file to the machine you have this tool on.
- Point to this CSV in the CSV tab and click the Transform button to save the final CSV which can be imported in Excel.
- To import in Excel go to Excel's Data tab and click From text button. Then press next and select comma as the delimiter and then do Finish and OK to get the result table in Excel.
Knowing your generated Corner File
The generated corner file looks something like this:So each corner run is separated and is sequential. In the end after the line
;;---MEASUREMENT EXTRACTION Is all the SKILL code to extract the measurements from all the run Data. You may find it useful to familiarize with the Measurement extraction section since sometimes by running just that part with tweaks can give you a whole lot of data about the simulations. I can help with that if anyone is interested.Creating a corner definition file
This is best understood by looking at an example file:As can be seen the file has 2 variables: corners and includeFiles. In all the above file is to be replaced by the process model file and the optional string following it like tt_eecel needs to be set to the section from the file that needs to be included.
corners is defined by tabulating the corner strings that will be placed in the GUI to map them to what files need to be placed in the corner ocean script when that string is encountered. So for example when the corner string is ssff then the oceanscript will have the following files and sections:
file,"ss_svt018"
file,"ss_hvt018"
file,"ss_lvt018"
file,"ff_svt050"
file,"ff_lvt050"
file,"tt_eecel"
file,"tt_ecel"
Note that the files in the includeFiles variable section are always included irrespective of the corner. includeFiles is optional and may not have any files in it.
Advanced plotting
The plotting and results saving section of the script looks something like:We can do specific plotting easily by changing the plotting commands after the
;;-- Plot Statements line as follows:Here are some notes that explain the above section:
- The cW function is already defined the Measurement Extraction section of the corner script and is used to select the current window to draw on when multiple plotting windows are open.
- When the first corner is measured then all the different plotting windows are created in the variables wid1, wid2, wid3 and titles are given to them.
- Depending on the value of i the right window is selected and data is added to it.
Advantages of the tool
- Easily and quickly generate complex sequence of corners
- Does not use ADE-XL license to run corners
- Append scripts generated for different test benches into 1 big file and submit it as a night job
- Automatically generate the full result table with measurement headings and corner settings to look in excel
- Even if some corners have errors like non convergence or bad measurements it does not stop the whole thing but shows those corners as bad data.
- If you have the nodes saved in the simulation you can generate more measurement data or waves without running the simulations again by just running the measurement part of the script.
- The tool is cross platform and can run on Linux, Windows, Mac. although I have just tested it on Windows.